
Measuring Up – Using the Sod Solutions Area Calculator Tool for Any Outdoor Measurements
When looking to install new sod in a yard, some of the most frequently asked questions tend to be, “How much sod do I need for my yard?” or “How many square feet does a pallet of sod cover?” Sometimes, people will greatly overestimate how much sod they will need and as a result, spend more money than necessary. Even more frequently, they underestimate the actual amount of sod needed. This common struggle has been causing headaches over many years. Sod Solutions created the Area Calculator Tool to remove some of the guesswork from this stage of the installation process. By using the Area Calculator, they will be able to have a better idea of how much square footage they will need to cover. From there, they can take that measurement and find out how much sod to order and begin calling to request quotes. Read below to find out more about the Area Calculator and how to use it.
Getting Started
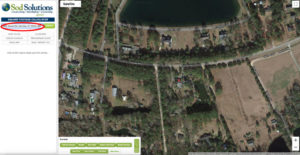
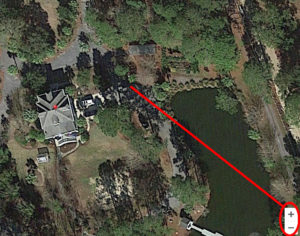
Start by entering the address you plan to install sod at in the left-hand toolbar and clicking “Search”. Zoom in on the property as needed by using the plus and minus signs in the lower right-hand side of the screen.
Entering an address.
Zooming in on the property
Creating an Overlay Shape
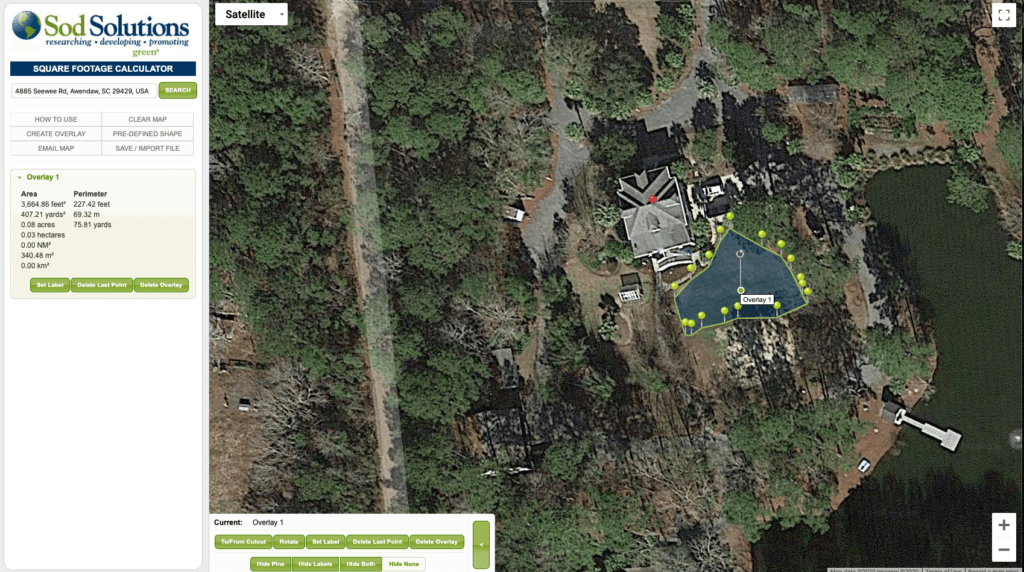
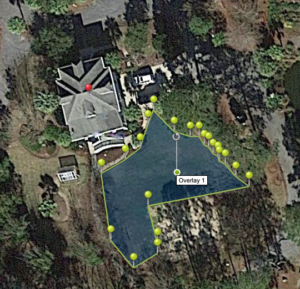
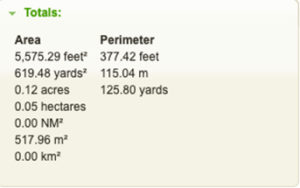
The next step is to create an overlay shape. First, click “Create Overlay” in the left-hand toolbar. Click on different parts of the map to draw a shape that covers the area you plan to install sod. Don’t worry—once you drop a pin, you will still be able to go back and remove it if you need to by selecting “Delete Last Point” near the bottom of the page, or by simply right-clicking a pin (using two fingers if you are on a Mac) and selecting “Delete Point”. As you draw an overlay shape, you will notice that the area and perimeter of the shape is automatically calculated in the left-hand toolbar. If you hover over the lines of the shape, you will see exactly how long the line is from pin to pin.

Selecting “Create Overlay”
Drawing an overlay shape
Adjust Shape as Needed
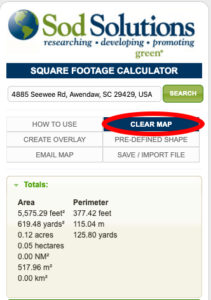
As you are drawing an overlay shape, feel free to change it around as much as you need to in order to get as close of a shape over your yard as possible. If you make a mistake somewhere in this process and want to start over, you can always reset the map by selecting “Clear Map” in the left-hand toolbar.
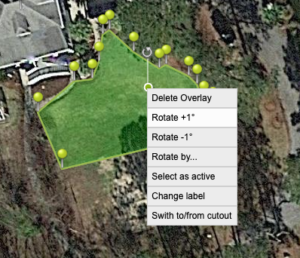
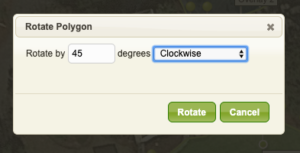
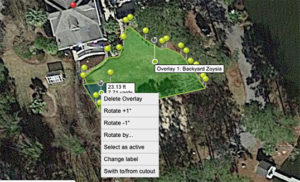
You can also click and drag a pin to move it to edit the shape as well, or click on the line of the shape to insert a point on the line. If you want to rotate an overlay shape, drag it’s rotation icon to the desired degree, or right click it and select one of the options in the pop-up menu to either: 1) rotate +1 degree, 2) rotate -1 degree or 3) rotate by a custom amount.
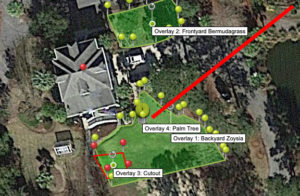
Creating Multiple Overlay Shapes
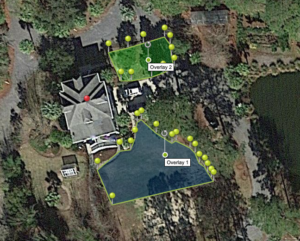
Some other features include creating multiple overlay shapes for different locations on the same property. For example, you may be using the area calculator to find out how much sod you need in both the front and back yard. To do this, finish creating the first overlay shape and select “Create Overlay” in the left-hand toolbar again. Begin dropping pins in the new location on the property and you will see the left hand tool-bar automatically adjust to portray three dialogue boxes for the area and perimeter measurements of Overlay 1, Overlay 2 and the total. As you progress, you can set labels for each overlay in case you need to title them with some specific details such as, “Overlay 1: Backyard Zoysia”.


From left to right; Creating multiple overlay shape process
Cutouts
A cutout is a special overlay that is used to highlight areas of land that you do not want included in the calculations, such as flower beds or trees. The area of a cutout is subtracted from the total area in the left-hand toolbar and the perimeter is omitted. To place a cutout, simply:
1. Create a new overlay,
2. Place the overlay over the area you would like to have omitted. This should be placed over an existing overlay.

3. Right click on the overlay’s midpoint and select “Switch to/from cutout”.
4. The overlay will now be set as a cutout indicated by red pins.
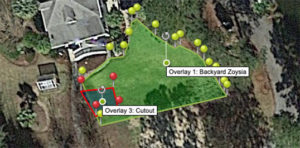
5. If you’d like to switch it back to a normal overlay, select the same “Switch to/from cutout” option from the menu.
Predefined Shapes
Predefined shapes like triangles, rectangles, circles and semicircles are offered for users convenience with user-specified measurements. Check this feature out by:
1. Selecting “Pre-Defined Shape” from the menu on the left-hand toolbar.

2. Selecting the shape you want and enter its dimension in the unit of your choice. The dimensions will change depending on the shape you select. For example, you may select a circle shape, which will ask for a radius measurement. A triangle shape will ask for the length of side 1, side 2 and the degrees of the acute angle.
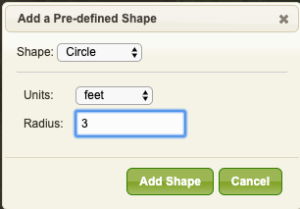

3. The shape will appear in the center of the map as an overlay. It’s measurements are also represented in the left-hand toolbar.
4. It can then be adjusted as needed.
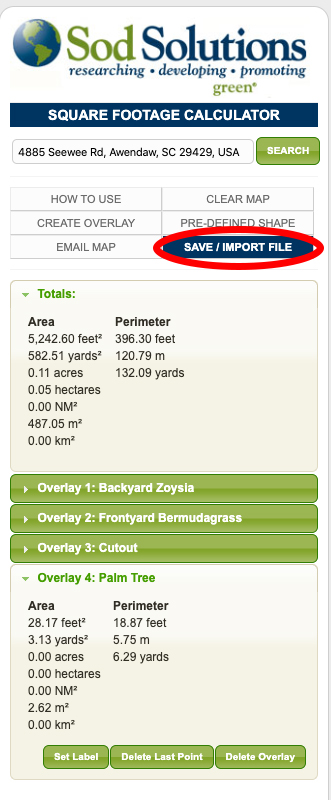
Saving and Sharing
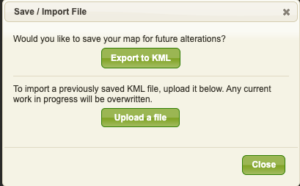
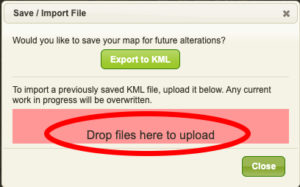
If you need to stop and continue your work later, select “Save/Import File” from the left-hand toolbar. Select the “Export to KML” button to have your map saved and downloaded onto your computer. Whenever you have time to come back to this map, you can select “Save/Import File” again, and then drag your exported KML file into the dialogue box where it states, “Drop files here to upload” or “Upload a file” to have your map open back up where you were last working on it. Saving the map as a KML file will also allow you to come back later to make edits or changes if necessary. It is recommended you do this just in case so you don’t lose your progress.
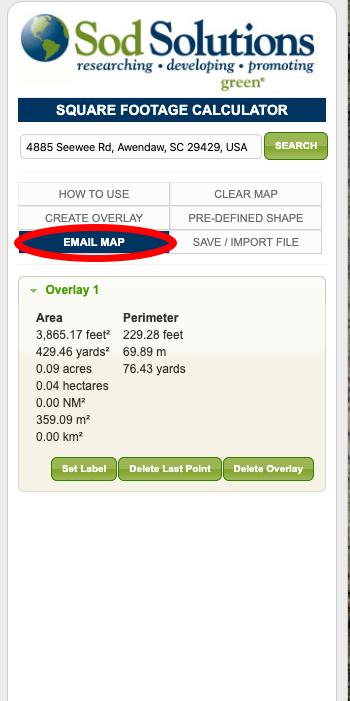
Once you have finished creating your overlay shape and your drawing is finalized, you can move forward to select a Sod Solutions grass variety or call around to research quotes for the job. Be sure to send a copy of the map to your email so that you can access your drawing and measurements at a later date. Sending it as an email is also useful if you want to share the map with a family member or a sod installation company. A link to your map will be sent to the email you choose to send it to, however, you will not be able to edit or change any details in the map from this link. Be sure to save it as a KML file for this reason and then re-import it back into the area calculator.
Final Tips
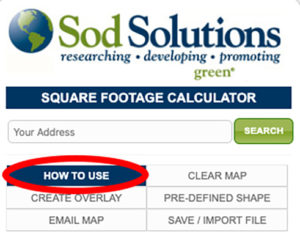
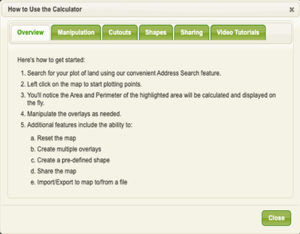
You can use this as a page to guide you through the use of the Sod Solutions Area Calculator. However, if you find yourself getting stuck, feel free to use the “How to Use” dialogue box that you can open up from within the Area Calculator page.
Now that you know how many square feet you need to cover, find out How Many Square Feet Are on a Pallet of Sod.
![]()
SAT Quote – The Future
Coming next spring, Sod Solutions will roll out the next generation of the calculator aimed at professionals. Called SAT Quote, this professional grade, paid platform will be:
- Fully mobile for iOS
- Adding in high resolution aerial and arthroscopic imagery
- Adding ability to store customer and product data
- Adding ability to create pdf quotes with imagery and email to clients
- Adding ability to create invoices and sync to Quickbooks and Xero
- Adding ability for customers to pay invoices online via Stripe or eBizCharge
- Adding ability to create and manage work orders to crews
This version will not replace the free version for homeowners but will be clearly aimed at the market that uses this on for day to day operations. Stay Tuned!